vscode 调试 C++/JavaScript
Microsoft Visual Studio Code:https://blog.csdn.net/freeking101/article/details/86715578
IntelliJ IDEA:https://www.jetbrains.com/products/
在调试 JavaScript 代码时, 其中 三种 比较 简单:
- 1.使用 Chrome 等 浏览器 调试
- 2. 使用 Ctrl+Shift+B 快捷键运行 html 文件,需要在 Tasks.json 配置
- 2.在 vscode 配置 JavaScript 运行环境
1. 使用 Chrome 等 浏览器 调试
Debugger for Chrome:https://marketplace.visualstudio.com/items?itemName=msjsdiag.debugger-for-chrome
Microsoft Visual Studio Code 中文手册:https://www.cntofu.com/book/98/README.md
vs code debug:https://code.visualstudio.com/docs/editor/debugging#_launch-configurations
VSCode 内置 Node.js 运行时,能调试 javascript,TypeScript。如果要 启动调试, 需要设置启动配置文件 launch.json。
单击调试视图顶部的配置齿轮图标

选择调试环境,vscode将在 .vscode 目录下生成一个 launch.json 的配置文件

launch.json 中有很多属性可以设置,通过 智能提示 可以 查看有那些属性可以设置。
如果 要查看属性的具体含义,可以把鼠标悬停在属性上面,会属性的使用说明。
在 launch.json 文件中的配置如下:
{

    "version": "0.2.0",
    "configurations": [{
            "name": "谷歌浏览器", //运行html文件,用谷歌浏览器打开
            "type": "chrome",
            "request": "launch",
            "url": "${file}",
            "sourceMaps": true,
            "webRoot": "${workspaceRoot}"
        },
        {
            "name": "nodeLauch", //单独调试js,即可以直接运行js
            "type": "node",
            "request": "launch",
            "program": "${file}", //这个配置成你要调试的文件、${file}当前打开的文件
            "stopOnEntry": false,
            "args": [],
            "cwd": "${workspaceRoot}",
            "runtimeExecutable": null,
            "runtimeArgs": [
                "--nolazy"
            ],
            "env": {
                "NODE_ENV": "development"
            },
            "console": "internalConsole",
            "preLaunchTask": "",
            "sourceMaps": false,
            "outDir": null
        }
    ]
}
在 launch.json 中会使用到一些 预定变量,这些变量的具体含义如下
${workspaceRoot} the path of the folder opened in VS Code(VSCode中打开文件夹的路径)
${workspaceRootFolderName} the name of the folder opened in VS Code without any solidus (/)(VSCode中打开文件夹的路径, 但不包含”/”)
${file} the current opened file(当前打开的文件)
${relativeFile} the current opened file relative to workspaceRoot(当前打开的文件,相对于workspaceRoot)
${fileBasename} the current opened file’s basename(当前打开文件的文件名, 不含扩展名)
${fileDirname} the current opened file’s dirname(当前打开文件的目录名)
${fileExtname} the current opened file’s extension(当前打开文件的扩展名)
${cwd} the task runner’s current working directory on startup()
2. 使用 Ctrl+Shift+B 快捷键 运行html文件
Ctrl+Shift+B 快捷键运行 html 文件,在 Tasks.json 中配置如下:
{
    "version": "0.1.0",
    "command": "",
    "isShellCommand": false,
    "args": ["${file}"],
    "showOutput": "always",
    "windows": {
        "command": "C:/Users/shannonliang/AppData/Local/Google/Chrome/Application/chrome.exe"
    },
    "tasks": [{
        "taskName": "webserver",
        "isBuildCommand": true,
        "showOutput": "always"
    }]
}
不想每次都按这个快捷键,请参考 npm 配置 node 服务方法:
How to view my HTML code in browser with Visual Studio Code?
https://stackoverflow.com/questions/30039512/how-to-view-my-html-code-in-browser-with-visual-studio-code
3. 在vscode配置JavaScript运行环境
1. 下载并安装 Node.js( Node.js 是 JavaScript 的一个运行环境 )
这个在 Node.js 官网或者中文网都可以找到
2. 配置vscode
点击 vscode中 “调试” 按钮,打开 launch.json 文件(或者使用 Ctrl+Shift+P 输入launch.json)
在里面添加
"version": "0.2.0",
    "configurations": [{
            "name": "Launch",
            "type": "node",
            "request": "launch",
            "program": "${workspaceRoot}/1.js",
            "stopOnEntry": false,
            "args": [],
            "cwd": "${workspaceRoot}",
            "runtimeExecutable": null,
            "runtimeArgs": ["--nolazy"],
            "env": { "NODE_ENV": "development" },
            "externalConsole": false,
            "preLaunchTask": "",
            "sourceMaps": false,
            "outDir": null
        },
        {
            "name": "Attach",
            "type": "node",
            "request": "attach",
            "port": 5858
        }
    ]
注意:${workspaceRoot} 为当前程序工作的绝对路径。
3.调试
新建一个js文件,将launch.json中program里面的1.js改为你要调试的文件名,并把改文件放在绝对路径下
(function name(params) {
    console.log("message");
})();
使用 F5调试,得到
node –debug-brk=37692 –nolazy Untitled-1.js
Debugger listening on [::]:37692
message
调试成功
3. vscode C++开发环境配置教程(教你如何用vscode写C++)
From:https://www.cnblogs.com/baihualiaoluan/p/10661669.html
MinGW、MinGW-w64 与TDM-GCC 应该如何选择?:https://www.zhihu.com/question/39952667
tdm-gcc:https://jmeubank.github.io/tdm-gcc/download/
VSCode 连接远程 linux 服务器进行 C++ 开发:https://www.cnblogs.com/sinicheveen/p/14203670.html
使用 VSCode 的 Remote-SSH 连接 Linux 进行远程开发:https://www.jb51.net/article/193264.htm
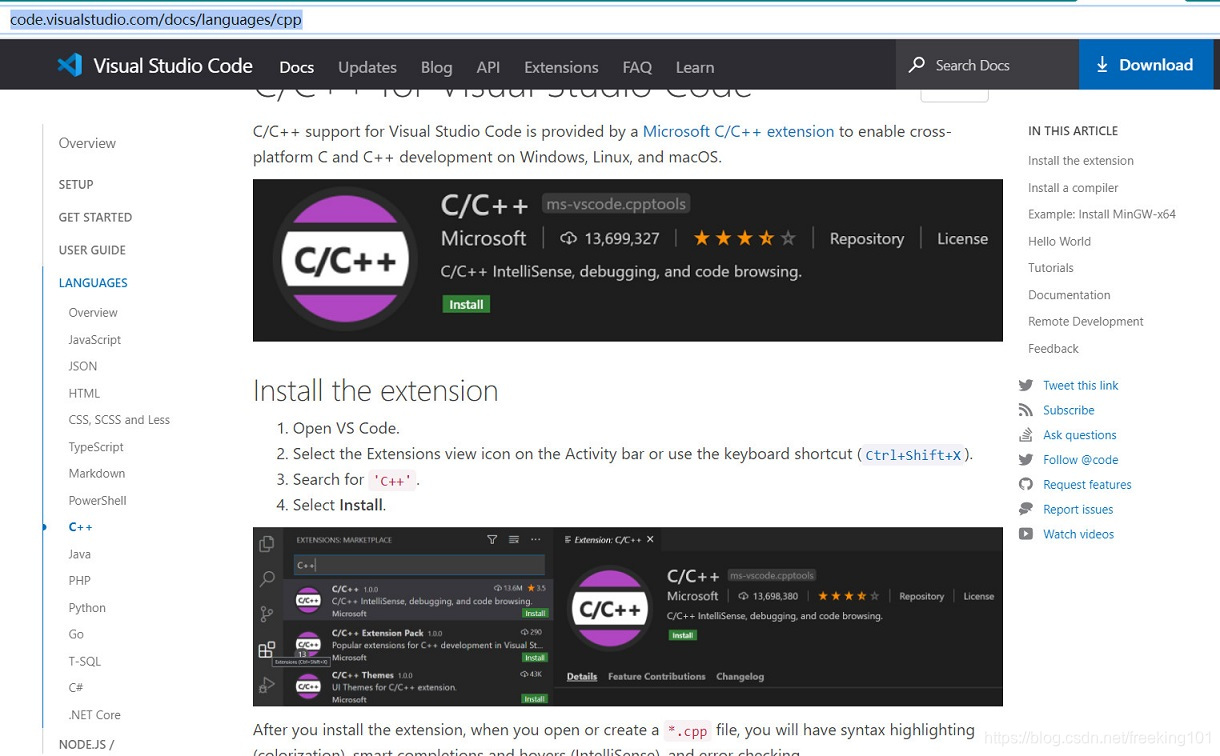
C/C++ for Visual Studio Code:https://code.visualstudio.com/docs/languages/cpp
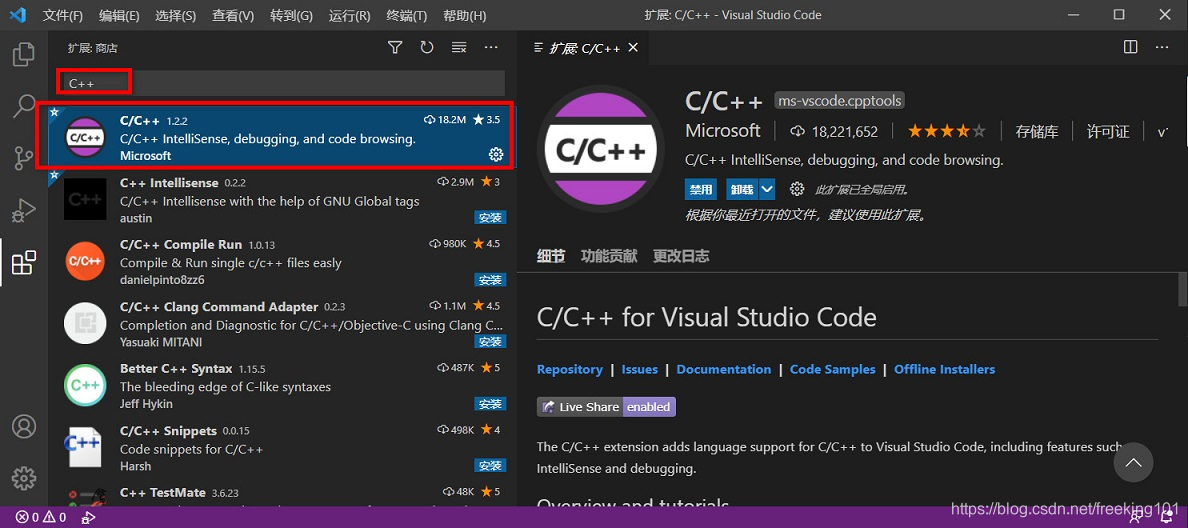
打开vscode
点击左侧栏第五个,在搜索框中输入”chinese”,安装第一个插件(汉化),
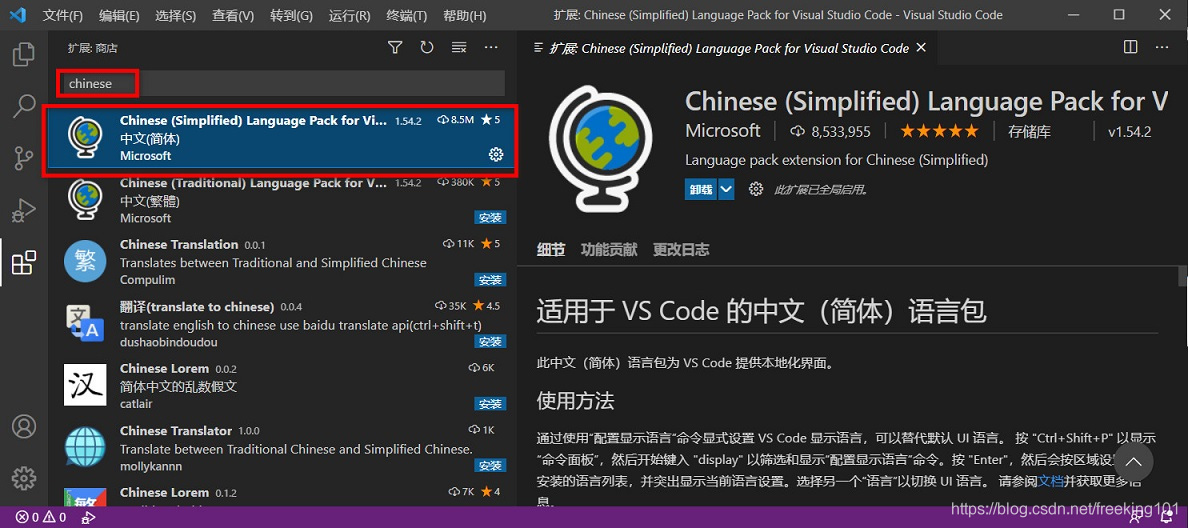
然后输入”c++”,也安装第一个插件,然后重启,继续进行下一步操作。
下载编译环境
在这里用的是 TDM-GCC,下载完成后按照默认安装即可,但要记住TDM-GCC的安装路径,在接下来要用到。
配置环境变量
在TDM-GCC安装完成后,我们需要将它的路径加入到系统的环境变量里
操作如下:我的电脑 —>右键 属性 —> 高级系统设置 —> 环境变量 —> 系统环境变量
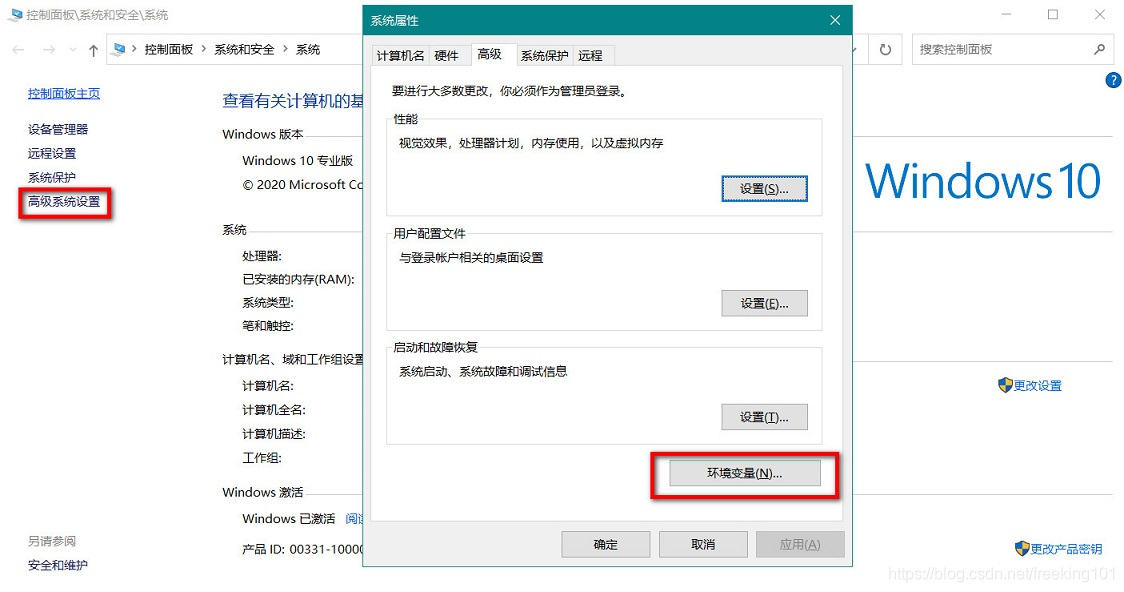
在 系统变量 中点击 path,然后点击编辑,将上面的路径加入即可。格式形如:C:\TDM-GCC-64\bin;
配置vscode里的环境
在 vscode 中,文件 —> 打开文件夹 —> 选择文件夹 —> 选中,这样就直接加入到 vscode 中了。或者直接把一个文件拖入vscode中。接着,在这个文件下创建一个 .vscode 文件夹(注意名字一定是.vscode),这是必须的(一般来说,每个文件夹中都会有这么一个 .vscode 配置文件)。注意:将此文件夹放在常用文件夹顶层,就不需要重复配置了。
在 .vscode 文件夹 中,新建两个(只需两个)配置文件,即 launch.json、tasks.json。将下列内容复制进去即可:
tasks.json
{
    "version": "2.0.0",
    "tasks": [{
            "label": "g++",
            "command": "g++",
            "args": [
                "-g",
                "${file}",
                "-o",
                "${fileDirname}/${fileBasenameNoExtension}.exe"
            ],
            "problemMatcher": {
                "owner": "cpp",
                "fileLocation": [
                    "relative",
                    "${workspaceRoot}"
                ],
                "pattern": {
                    "regexp": "^(.*):(\\d+):(\\d+):\\s+(warning|error):\\s+(.*)$",
                    "file": 1,
                    "line": 2,
                    "column": 3,
                    "severity": 4,
                    "message": 5
                }
            },
            "group": {
                "kind": "build",
                "isDefault": true
            }
        }
    ]
}
launch.json:
一定要注意:miDebuggerPath 这一条,要与你TDM-GCC安装路径一致,注意在路径中 ‘\’要替换为’\\’,就像下面一样。
{
    "version": "0.2.0",
    "configurations": [

        {
            "name": "(gdb) Launch",    // 配置名称,将会在启动配置的下拉菜单中显示
            "type": "cppdbg",         // 配置类型,这里只能为cppdbg
            "request": "launch",    // 请求配置类型,可以为launch(启动)或attach(附加)
            "program": "${fileDirname}/${fileBasenameNoExtension}.exe",// 将要进行调试的程序的路径
            "args": [],                // 程序调试时传递给程序的命令行参数,一般设为空即可
            "stopAtEntry": false,     // 设为true时程序将暂停在程序入口处,一般设置为false
            "cwd": "${workspaceRoot}",// 调试程序时的工作目录,一般为${workspaceRoot}即代码所在目录
            "environment": [],
            "externalConsole": true,// 调试时是否显示控制台窗口,一般设置为true显示控制台
            "MIMode": "gdb",
            "miDebuggerPath": "C:\\TDM-GCC-64\\bin\\gdb64.exe",// miDebugger的路径,注意这里要与MinGw的路径对应
            "preLaunchTask": "g++",    // 调试会话开始前执行的任务,一般为编译程序,c++为g++, c为gcc
            "setupCommands": [
                {
                    "description": "Enable pretty-printing for gdb",
                    "text": "-enable-pretty-printing",
                    "ignoreFailures": true
                }
            ]
        }
    ]
}
编写第一个C++程序
在配置完成后,建立一个 test.cpp 文件,粘贴以下代码
#include <iostream>
using namespace std;
int main()
{
    cout << "Hello Vscode" << endl;
    getchar();
    return 0;
}
打上断点,如图:
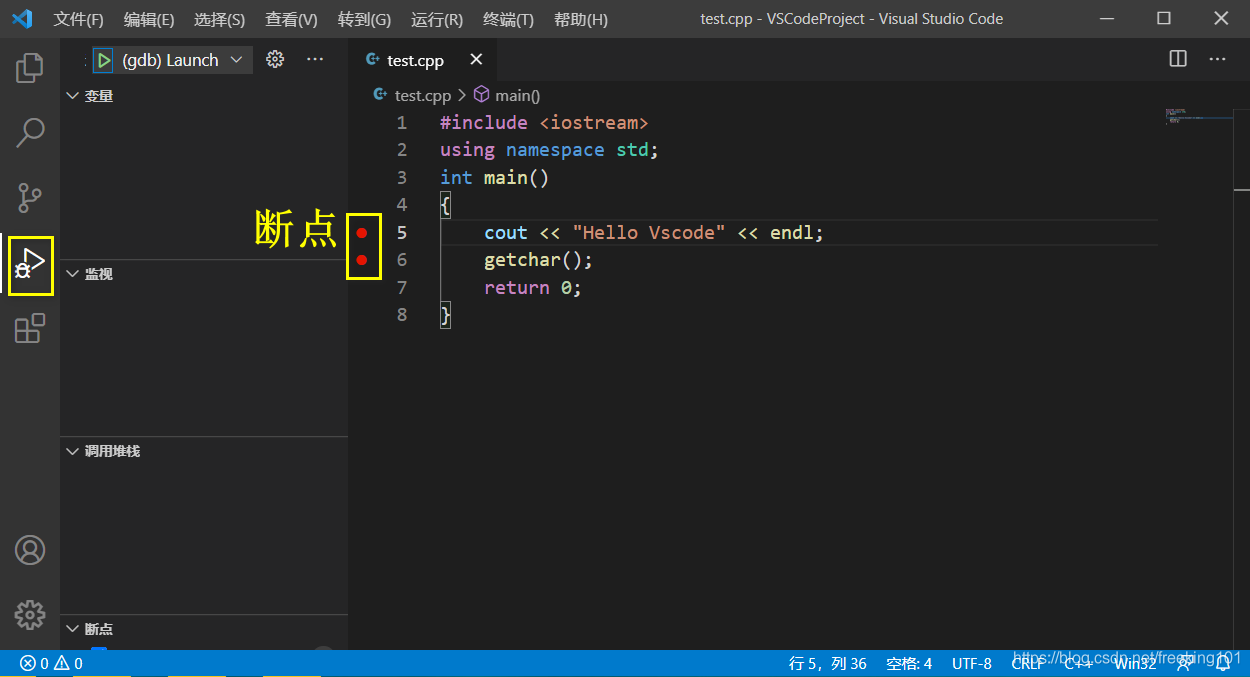
因为 vscode 在执行完程序后会退出,所以可以选择增加一个断点或者加一句 getchar(); 接下来,Ctrl+F5 运行

免责声明:全网优质文章转载,以作为收藏留档之用,文章均不代表本人立场!
请尊重原创作者,如需转载请标注原创作者链接